[ newsletter ]
Stay ahead of Web3 threats—subscribe to our newsletter for the latest in blockchain security insights and updates.
Thank you! Your submission has been received!
Oops! Something went wrong. Please try again.
Discover how to choose the best sol scanner for your 3D projects with this comprehensive, expert guide.


Picking the right sol scanner for your 3D projects can feel overwhelming. There are so many models out there, each with different features and price tags. Whether you’re just getting started or you’ve been scanning objects for years, it’s easy to get lost in the details. In this guide, I’ll break down what you need to know about sol scanners, from how they work to what to look for when buying one. My goal is to help you cut through the confusion and find a scanner that fits your needs and budget.
Getting into 3D scanning with a Sol scanner can feel a bit overwhelming at first, but the basics aren't as complicated as they sound. Let’s walk through the core ideas you’ll need to understand before picking out a scanner for your own projects.
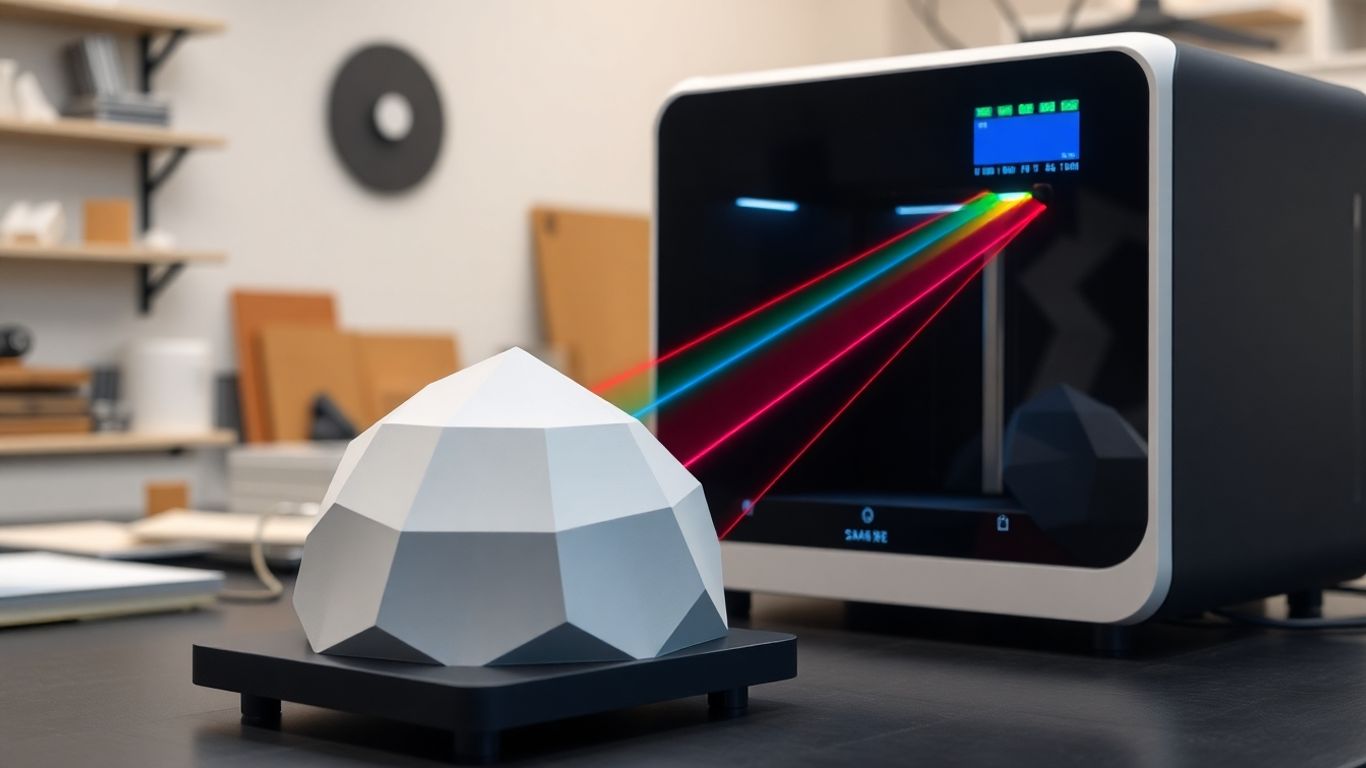
Sol scanners build up a digital 3D model by taking many precise measurements of an object’s surface. The scanner collects cloud-points of data by either projecting light onto the item or using cameras and sensors to map out shapes and surface detail.
The main scanning methods you’ll encounter include:
If you're new to this, the scanner’s hardware and included software do most of the heavy lifting – you just choose the right scanning mode and follow the prompts.
Not all 3D scanners work in the same way. Here’s a little cheat sheet on what’s out there:
Some popular Sol-style desktop scanners use structured light or laser triangulation. Photogrammetry might be what your smartphone uses with the right app, while industrial scanners often rely on LiDAR.
3D scanning with a Sol scanner can fit into many different jobs. Some common uses include:
Working Sol scanners into your process can save you time and help you avoid mistakes when jumping from physical to digital workflows.
Don’t stress too much about which scanning method is “best” yet – just know that each has its strengths. When you see terms like structured light or laser triangulation in scanner specs, you’ll have an idea what’s being offered.
When you're picking out a sol scanner for your 3D projects, the technical specs only tell part of the story. From fine details to the speed that fits your workflow, everything matters—especially if you want results that match your expectations without endless frustration.
You want your scans to accurately represent your objects, especially if you're involved in design or engineering. Pay close attention to two main specs:
Here's a quick comparison of some popular specs:
It's tempting to chase the highest numbers, but consider your type of project—sometimes extra accuracy isn’t necessary.
No one wants to wait forever for a single scan—especially if you have lots of items. Scan speed can be a big deal, particularly in settings where time equals money.
If you scan often or work with batches, choose a scanner that fits your deadline—not just your wish list.
A scanner with excellent specs is only as good as its software and workflow. Beginners and pros alike struggle with clunky interfaces or software that doesn't play nicely with their other tools.
Look out for:
Don’t underestimate the value of intuitive software and solid customer support—it can save hours (and headaches) in the long run.
Choosing the right sol scanner is as much about fit as it is about features. Think through your workflow, the types of objects you'll scan, and your patience for troubleshooting—then focus on the specs that really impact your daily work.

Choosing a Sol scanner isn't just about grabbing the first device you see online. The options available cater to different requirements—some are great for learning, others pack the power needed for professional work, and there are those that balance power with portability. The right Sol scanner will fit your workflow, budget, and the complexity of your 3D projects.
If you’re just starting with 3D scanning, look for devices that don’t overwhelm you with complex features or heavy software requirements. Consider these options:
Beginners often discover that it's worth paying a bit more for ease of use and good customer support over chasing maximum specs initially.
Professional users demand accuracy, speed, and versatility. These scanners often handle challenging surfaces and larger objects without a hitch:
Different projects call for different scanner formats. Here’s a quick breakdown:
Portable Scanners:
Desktop Scanners:
Choosing between portable and desktop models depends on what you plan to scan most often. If you work in one location with small parts, desktop is easier. But if your work takes you out of the workshop, portable is probably the way to go.
Sol scanner performance depends on more than just specs on a page. Real-world results come from a mix of factors. Let’s break down what actually matters once you start scanning objects for your 3D projects.
The size and surface details of what you’re scanning make a big difference. Not all scanners handle every object equally well.
Sometimes, basic preparations like applying a scanning spray can improve scan quality, even with a budget scanner.
Light and environment affect scan results, even when the hardware is top notch:
List of tips for best results:
Some sol scanners only capture shape (geometry), but others also record surface color and texture (albedo). Consider:
If you want the full picture—including color and texture—double-check that your sol scanner supports these options. Basic models might skip them entirely.
When you bring a Sol scanner into your project process, there are a few parts that really matter. It's not just a matter of pointing and clicking; the results depend a lot on what happens before and after the scan. Let's go through the main steps to make your workflow as smooth as possible.
Proper preparation is the number one way to avoid headaches later in the process.
After your scan, you'll have a point cloud or a rough mesh. This is just the starting point:
Once you’re happy with the scan, it’s time to move it into the rest of your digital toolkit:
Some common steps in a Sol scanner-based 3D workflow:
Getting your workflow right with a Sol scanner can take a bit of practice, but it saves tons of time down the road. Start simple, test your process, and tweak as you go.
Scanning projects rarely go perfectly the first time. It's totally normal to face setbacks when using your Sol scanner, but that doesn't mean you can't get back on track quickly. Let's run through some practical fixes for the most frustrating problems people encounter.
If calibration errors keep popping up, unplugging the scanner and plugging it back in after a short wait often clears hidden software hiccups.
Keeping up with these habits makes your Sol scanner far more reliable and helps avoid unexpected downtime. Everyone has run into scan headaches—what matters most is having a toolkit of solutions ready to go.
Picking the right Sol scanner for your 3D projects can feel a bit overwhelming at first, especially with so many options out there. But once you figure out what you actually need—like the size of objects you want to scan, how much detail you care about, and your budget—it gets a lot easier. Some scanners are better for beginners, while others are built for more serious work. It’s a good idea to read reviews, maybe watch a few videos, and see what other people are saying about the models you’re interested in. At the end of the day, the best scanner is the one that fits your workflow and helps you get your projects done without too much hassle. Take your time, do a bit of research, and you’ll end up with a tool that makes your 3D work a whole lot smoother.
A Sol scanner is a device that captures the shape and texture of real objects to make digital 3D models. It shines light or uses cameras to scan the surface, then special software turns the data into a 3D image you can use on a computer.
Yes, many Sol scanners are made for beginners. Some models, like the Scan Dimension SOL Desktop, are simple to set up and use. They often come with easy software and guides to help you get started.
You should check how clear and accurate the scans are, how fast the scanner works, and if it is easy to use. It's also important to see if the scanner can connect with the software you use for 3D printing or design.
Yes, there are handheld Sol scanners, like the XYZprinting Handheld 3D Scanner, that are small and easy to carry. These are great if you need to scan things outside your home or studio, but they might not be as precise as bigger desktop scanners.
To get the best scan, make sure the object is clean and placed in good light. If the object is shiny or very dark, you might need to use a special spray to help the scanner see it better. Always follow the scanner’s setup instructions for the best results.
If you have problems, check the calibration and make sure nothing is blocking the scanner. Clean the lenses and restart the software. If the scans still look bad, try scanning in a different light or ask for help from the company’s support team.